Category: project
Showing posts with label project. Show all posts

Tie-Dye T-Shirt Fun!

Saturday, 7 November 2020 No comments

Oh my gosh!  This is one of my favorite projects we do every school year!  The kids are always so amazed at how their shirts turn out and when they realize they actually created it.  It's such a fun memory for everyone.

Now, I'll be the first to admit that tie-dying t-shirts with 20 or more 5-year-old sounds scary.  But if you plan everything out and do the prep work ahead of time, it will work out.  And having at least one extra pair of hands (I'm so thankful for my classroom assistant) will also help! haha

Usually I have the kids bring in a new white t-shirt in their size and write their name on the collar.  I also decide how I'm going to tie the shirts (lots of cute ideas on Pinterest) to get a design and twist and rubber band around them in advance.  Once I have the rubber bands on the shirt, I place it in a gallon zip lock bag with the child's name so I know it is their shirt and can be organized when it's time for the real fun.  This also allows me to be prepared with a bag to place their shirt after they apply the dye and it's wet.

Some other things I always have are some plastic disposable aprons, gloves, paper towels, and a trash bag handy to help manage the mess and for cleanup.  When it is their turn, the kids wear an apron (I try to use it for more than one kid since they usually don't get dirty), gloves, and I always use some sort of container for them to place their shirt in and squirt the dye on it.  This helps contain the mess.

Once the shirts are done, I send them home with the kiddos and a sheet of directions for their parents about rinsing and washing the shirt.  You can find a copy of the instructions here in my TPT store.  I really like for them to be able to take their shirt home and do this part so they get the full experience of the process.  In the past, I have done orange and white shirts and painted jack-o-lantern faces on the front.  Then, I started doing orange, yellow, and white (think candy corn!) and painting the jack-o-lantern faces on the front with fabric paint once they send them back to school.  I always do this in the fall and we wear them on our first field trip of the year, which is usually to a pumpkin patch or farm.
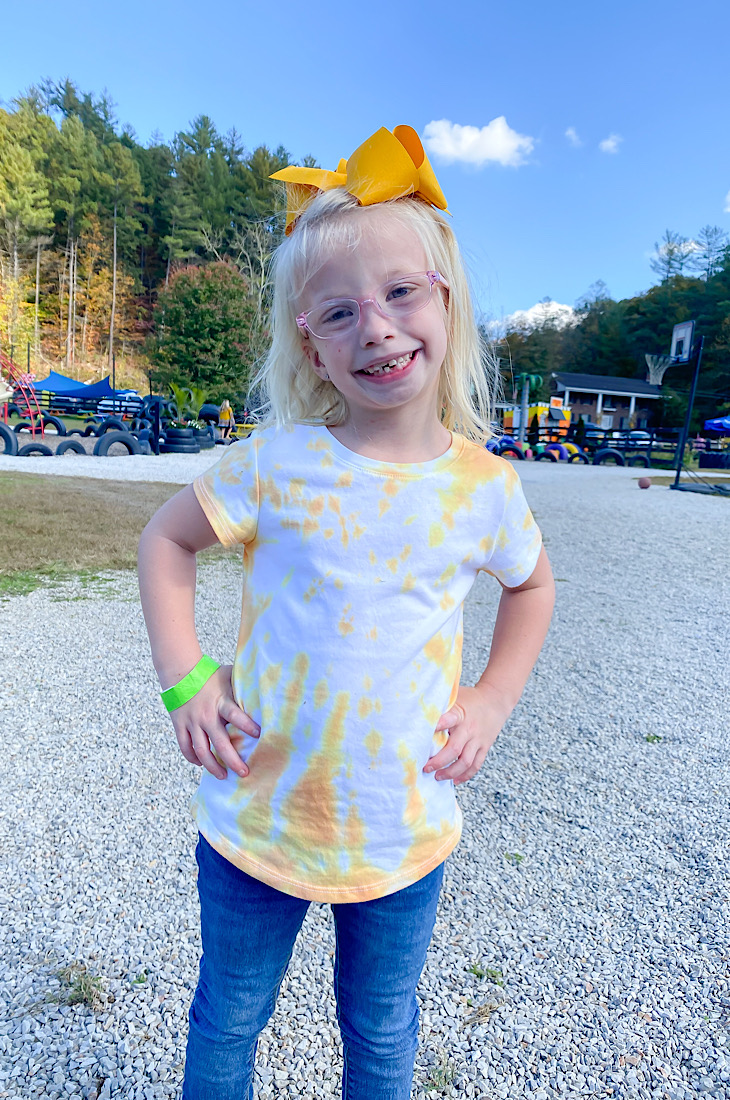
Unfortunately, 2020 had different plans for us.  No field trips will be happening anytime soon, but I still wanted the kids to have the fun experience of creating a tie dye shirt.  So, we went ahead with the orange and yellow dye, but we didn't paint faces on them so they could wear them anytime.  We got to go to school face-to-face for a few weeks, so I was able to do this project just in time for them to take the shirts home and rinse and wash them.

Tie-dying shirts is a fun project to do anytime of year.  Any color of dye would be perfect and you can pair your colors to whatever occasion you might be celebrating!
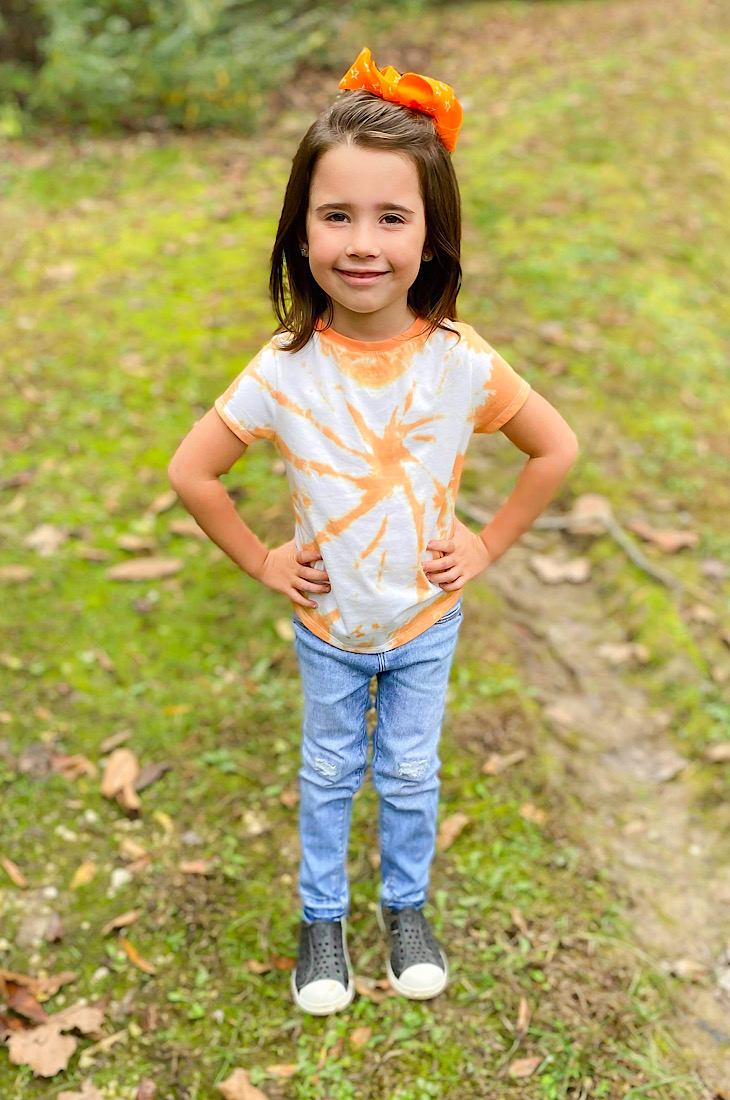

I purchased my dye from Amazon.  Here are some links for different colors:

Tulip Orange Tie-Dye Refill

Tulip Red Tie-Dye Refill

Tulip Yellow Tie-Dye Refill

Tulip Blue Tie-Dye Refill

Tulip Purple Tie-Dye Refill

Tulip Pink Tie-Dye Refill

Tulip Green Tie-Dye Refill

Mini Classroom Makeover: Student Desks

Sunday, 18 October 2020 No comments
This year has been anything but normal.  I feel like I have to put an extra effort into everything I do to make school fun and interesting for my kindergarteners.  All the activities I have done in the past have to be modified and tweaked so that they follow the guidelines set for in person classes, but I have managed to make everything work.  One thing that I had to do in my classroom that I didn't like is space my desks apart from one another.

I know this is nothing new to the world we are currently living in.  Desks are spread apart in classrooms across the United States and teachers are making it work.  It definitely isn't my favorite classroom arrangement for kindergarten, but I have also managed to make it work for my students.  I typically like to have them grouped together so that they can socialize.  Making friends, sharing, and helping others are some very important skills that kids learn and practice in kindergarten and is easily done when the students are close together.  This year, we had to learn to do these things with our desks spread apart.

The day I spread my desks apart, separating my students on their own "island," I hated it.  It made my classroom so ugly and it lost that inviting feeling it usually has.  I had to do something!  My KinderTeam had seen a teacher in a Facebook group paint her students desks and we all loved the idea, but just weren't sure how to tackle this project!  We didn't know what kind or how much paint we would need, the decision of colors seemed so overwhelming, and we kinda just sat on the idea for a while.  Then, one day, Mrs. Fletcher surprised us all by being brave and purchasing the paint.  She talked it over with the paint specialist at Lowe's and they recommended what kind of paint for us to use.  So, she dove right in and bought it in six awesome colors!  Here is the paint we used.


Mrs. Fletcher was so excited about painting her desks and ready to dive right in.  I figured I would let her go ahead and paint first as a trial run so we could see how it worked out.  πŸ˜‚  She used all six colors and her desks turned out great!  Here is a before and after of what hers looked like.

Before Painting

πŸ’œπŸ’›πŸ’šπŸ’™The Finished ProjectπŸ’™πŸ’šπŸ’›πŸ’œ

Next, Mrs. McGinnis painted hers.  She decided to use all 6 colors as well and her desks turned out so pretty and colorful as well!  This really brightened up the classrooms and made them look so cheerful!  Here is how her project turned out.


I painted my desks last.  After seeing theirs, which I loved, I decided to make mine a little different and just use three colors instead of all six.  I tried to think ahead to the future and what color schemes I might like next school year because this isn't a project I plan to repeat. πŸ˜‚

The painting didn't take nearly as long as I expected.  I did have to put two coats of paint on the desks, except the yellow, which needed three coats.  I absolutely loved the way they turned out.  My classroom was feeling so dark and dreary and this little bit of paint changed the whole feel of the classroom!  I felt so proud of this little project once it was finished and I'm so glad we decided to do it.  It made my happy place so much happier!  Below is a before and after of the desks in my classroom.

The "Blah" Before Pic--Ignore all the messes in the background.  Students were just coming in for a transition day that was planned on the fly. lol

Painting the desks seemed like such a small thing, but the kids were so excited when they came into the classroom on their first full day of face-to-face learning.  They loved that their desk was a special color and it personalized the space for them.  I can't believe I waited so long to do this little project!

πŸ’œπŸ’›πŸ’™My Finished DesksπŸ’™πŸ’›πŸ’œ

What sorts of things have you done in your classroom to perk it up this school year?  Do you have any special little projects that you have completed to brighten your classroom space?

Fun with Primary Colors-In Person!

Saturday, 26 September 2020 No comments

It’s official. I have taught 22 days of kindergarten virtually—something I never expected to do. However, this past week, I had the opportunity to have some small groups of kids come in for 2 hour blocks of time as a transition day to get them ready to return to in person learning next week. They were so excited to be in their real classroom! 

 Essentially, this small 2-hour window of time was their “first day of kindergarten” in the classroom. It felt so odd after teaching virtually and seeing them on a computer screen everyday, but the kids were so excited to come to school! Amazingly, there weren’t any tears and only happy faces (under their mask, of course)! 


This wasn’t our typical first day of school and these kids were ready for some action, so I decided to do a fun lesson that would incorporate some hands-on fun! I started off by reading “White Rabbit’s Color Book” by Alan Baker (click to get it here from Amazon). After reading the story, which talks about primary colors and what happens when you mix them together, we decided to give it a try. The students gathered around me as I got out a white plate and some red, yellow, and blue paint. We flipped though the story again and discussed the colors the bunny dipped himself in, then tried mixing them on the plate to see if it really made these new colors. The kids were so amazed to see that mixing two primary colors together actually made a new color! 


After our little paint experiment, I decided it was time for the kiddos to try a little experimenting of their own to make a secondary color. Each of them got a cup of white icing and a plate of cookies. They had to decide what two colors they wanted to mix together to get a new color of icing. Once their choice was made, I squirted some gel food coloring into their icing (it just take a little) and they mixed it up well until they got their new color! The excitement in the room was through the roof! They loved using their little plastic knife to spread the icing on their cookies before they enjoyed their treat (Side note: They did amazing with the plastic knife, but I wouldn't trust all groups with it πŸ˜‚) ! 


To conclude this fun little lesson, we did one more experiment together. I saw this video on The Adley Show (my whole Kinder Team loves her and were excited to see her do something we could spin for a project at school) and couldn’t wait to try it for myself. It didn’t disappoint! Once again, the kids gathered around as they watched me perform each step of the experiment. I poured milk into a pie pan. Then I squirted some food coloring around the edges of the pan. I started with blue, then moved toward the middle to do a line of yellow around the pie pan, and then I put a lot of red food coloring right in the center. Next, I soaked a cotton ball in some Gain Laundry Detergent (I cut open a laundry pod) and placed it in the middle of the pie pan. The colors instantly started moving and you can hear the amazement as the kids watched the colors mix! Click below to watch the video of the experiment as it happens and hear their excited voices! 


 This was such a fun little lesson and a great way to start off the year in person with my class. I definitely recommend this experiment and think it would be a fun way to explore primary and secondary colors for various grade levels up to at least 2nd grade. 

Starting Monday, all my students will be able to return in person. Of course we have no idea how long it will last, but we are prepared to take all the precautions we can and take advantage of our time together. I hope everyone else is off to a great start this year and I’m still praying for some normalcy as we get our kids back into our classrooms and ready to learn!

Time Capsule Project

Monday, 1 June 2020 No comments

Whew!  This past week has been a busy one, but the school year is officially over.  I got to go back to work, minus the kids of course.  I was glad to get back and see all my co-workers and I finished up all my end of the year tasks.  I talked about the way I closed the year out with my students on my last blog post.  After they were able to come pick up their personal belongings, I still had to work one more week to tie up any loose ends.


One of the last projects we did was The Time Capsule Project.  The Time Capsule project is one of my favorite projects and I tweaked it a little last year to make it more personal for my students and our school. Last year was the first time I had ever done this project and I’m excited to continue it every year!  Basically, each child puts things inside the time capsule (pictures, art, writing pieces, etc.) and then I put it up to store it until those students graduate from our school in 6th grade.  At that time, we will pass it down to their 6th grade classes, let them open it up, and see how they’ve grown and changed! 

This was what we had inside last year's box.  It looks a little messy, but I think it'll be fun for the kids to go through in the future.

The end of the year is a very busy time, so this project usually feels a little rushed.  But that’s okay because it’s not about necessarily creating something new, but just putting in something you previously did during the school year!  This year ended a little differently so I gave my students a blank template to complete and put in the time capsule.  Here is a super cute one from TPT that works perfectly for this!  The students were also encouraged to bring a picture, drawing, or work sample for the time capsule on the day they picked up their graduation items from the classroom.  The only thing they really had to do was drop it in the box and it’s done!  Don't stress yourself out over organization as long as everything has a student name on it.  That'll be part of the fun when they go back through the box the year they graduate!

A large pizza box is perfect to put the items in!  I need to design a super cute sign to tape on the front of the boxes!

We have three kindergarten classes at our school.  As the years pass, the students will not always remain in the same class together.  So, rather than have 3 boxes to keep up with each year, we put all the time capsule items from all three classes together in one box.  That means we only have one box to store and keep up with, which is less storage space and not as much concern about misplacing the time capsule.  For store, I use a pizza box, which gave us plenty of room for items, and it is easy to store and place up on a shelf that is out of the way!

The pizza boxes fit perfectly on the top shelf of our storage room.  They are out of the way and shouldn't get lost since we don't typically move those items around up there.

I love this cute little project and can’t wait for the first year that the 6
th graders will get to open it!  It’s always neat to look back on pictures and drawings from years past and I expect the kids will enjoy seeing how much they have changed.  Do you do a time capsule project in your classroom?  What does your project look like?